BrandsImprove this page
After creating an account and getting access to the dashboard, the next step is to create a test Brand (Merchant). This lets you create locations and add them to a Program so you can start tracking transactions.
The Brand object is used to aggregate locations and keep track of the Brand consent. To track real-time transactions at a Brand's locations, you need to obtain consent from authorised personnel (Brand Contact), and provide the Brand with access to view transactional data. You can do this when creating the Brand (see below).
Once you create a Brand, it cannot be deleted.
Create Brand

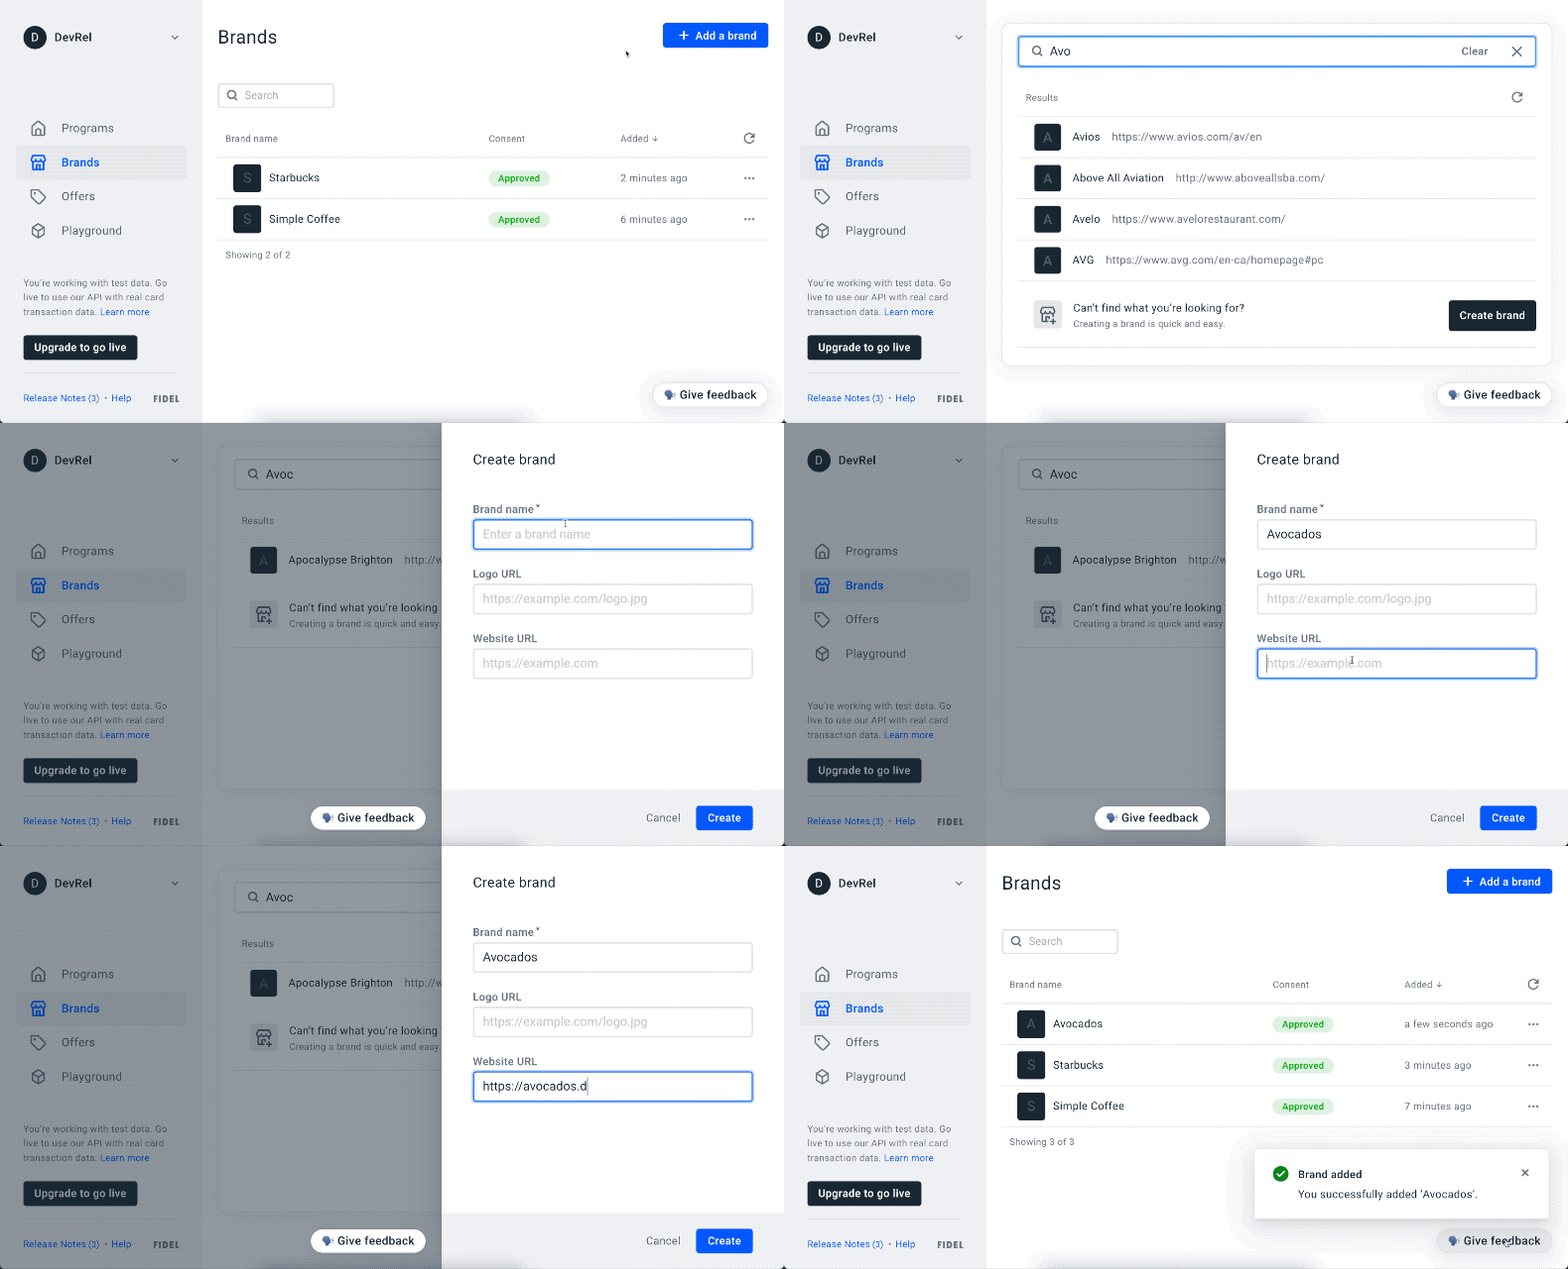
To add a new Brand, go to the Brands page on the Fidel Dashboard, click the Add a brand button and enter a name. If you can't find the brand in the Fidel Dashboard, you can create a new one. Optionally, you can add a link to the brand website and logo (Note: the links cannot be added later using the Dashboard). You can also create a Brand with the API:
12345678910curl -X POST \
  https://api.fidel.uk/v1/brands \
  -H 'Content-Type: application/json' \
  -H 'Fidel-Key: <KEY>' \
  -d '{
    "name": "Brand B",
    "logoURL": "https://example.com/logo.png",
    "websiteURL": "https://example.com/"
  }'
Image Upload Rules for the Dashboard
To ensure images render correctly in the dashboard, please adhere to the following constraints and recommendations when handling image uploads:
✅ Requirements
- Max file size:
1MB - Min dimensions:
360x360pixels
⚙️ Dashboard Behavior
- The dashboard does not manipulate the uploaded image.
- After upload, users can zoom and reposition the image, but no cropping or resizing is enforced. Bear in mind that zooming might decrease the image's quality.
🧠 Recommendations for Best Results
- Use an image where the logo fills the 360×360 area or has minimal whitespace.
- The uploaded image should be sharp and high-resolution.
- Blurry logos typically mean the source image is low quality, or has been stretched without preserving aspect ratio.
ℹ️ Important: It's the uploader’s responsibility to provide a clean, properly sized, and high-quality image. The dashboard won't correct poor inputs.
Brand Consent
NOTE: Brand consent is only required in the Live environment. Test Brands are automatically given Brand consent.
All brands must be approved by the authorised Brand Contact. There are two ways that brands are approved. For an external brand, you may request Brand consent either in the dashboard, or with our API. For self-funded Brands, this can be skipped by auto-approving consent.
Requesting Brand Consent
On the dashboard, enter the name and email of the Brand Contact and Fidel will send an email inviting them to create a Brand account at clo.fidel.uk. To request Brand Consent with the API, use the Brand Consent Endpoint. After creating an account, the Brand User provides consent and will have access to transactions made by cardholders at participating locations.
You can monitor consent status on the dashboard and also set up a brand.consent webhook to be notified when the status changes.
Auto-Approve Consent
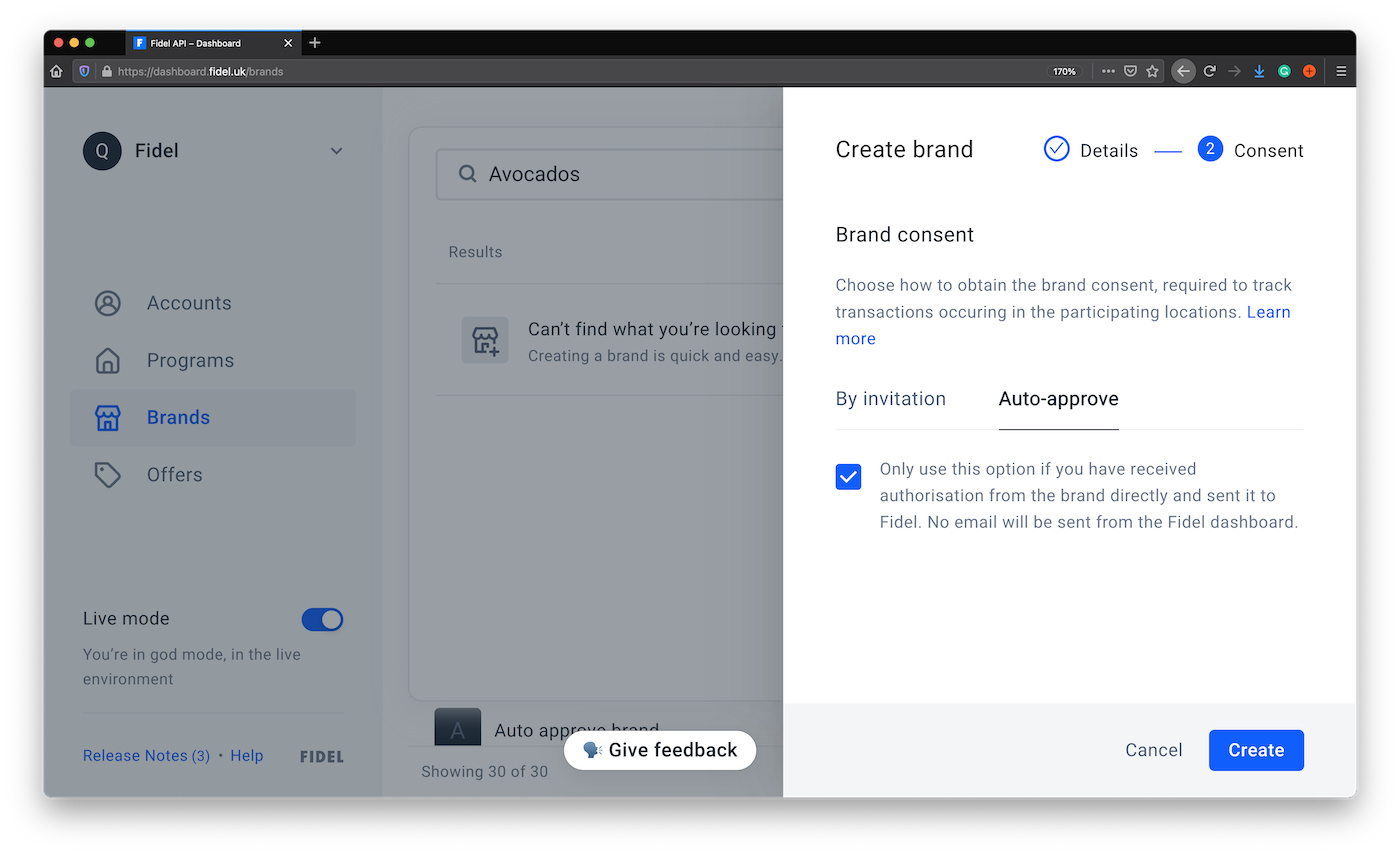
If you're funding your own offers, or you've received direct authorisation from a brand, you can auto-approve the brand's consent:

Using the Create Brand User endpoint in the Brand Consent API, you can auto-approve your Brand by adding skipInvite: true to the JSON request with the brand owner information. Keep in mind this endpoint only works with your Live API Key, the one that starts with sk_live_. You'll also need to have a Brand and Program created with the same live API key, before you can use the endpoint. Here's a cURL example, don't forget to replace {brandId} and {programId} before running it.
123456789101112curl -X POST \
https://api.fidel.uk/v1/brands/{brandId}/programs/{programId}/users \
  -H 'Content-Type: application/json' \
  -H 'Fidel-Key: <KEY>' \
  -d '{
    "email": "email@fidel.uk",
    "nameFirst": "Test",
    "nameLast": "User",
    "title": "Docs",
    "skipInvite": true
}'