Web SDK v2 v3 v4Improve this page
The Fidel Web SDK v4 provides a secure, PCI-compliant way to integrate card-linking and card-enrolment capabilities directly into your web applications. By embedding the SDK as a secure HTML iframe, card details are transmitted directly to Fidel's secure vault without exposing your servers to sensitive cardholder data. This dramatically reduces your PCI-DSS compliance scope.
Using the Fidel SDKs, card details are sent directly to the Fidel API through a secure connection without exposing your servers to sensitive information. They take care of all PCI Compliance requirements, so you don't have to.
Your users will need to have JavaScript enabled in their browsers. However, for mobile apps we recommend using the React Native bridge.
You can customize the UI of the SDK to match your use case. All modern desktop and mobile browsers are supported, including Chrome, Firefox, Safari, Microsoft IE11 and Edge.
After successfully tokenising and linking a card on the Visa, Mastercard or American Express networks, the Fidel API returns the created Card object. The Card object has a unique id that you can use to link each unique card and transaction to your user's account. The id of each linked card is present on the Transaction object as well, as cardId. You can create card-linked web and mobile applications with online and offline transaction data visibility in a matter of minutes.
Environments
To begin integration, select the appropriate environment for your phase of development.
| Environment | Usage |
|---|---|
| Development | For initial integration testing and local development. |
| Staging | For pre-production tests and QA approvals. |
| Production | For live production traffic. |
The API endpoint is the same across all environments. Only the credentials (PUBLISHER_IDENTIFIER and PUBLISHER_API_KEY) differ between environments.
Integration Flow Overview
Before loading the SDK, your backend must determine if the card linking is for a new user or an existing user. For existing users, you must perform a backend-to-backend "Pre-bootstrap" API request to retrieve a secure, short-lived session token.
Pre-bootstrap API Request (Backend Only)
To link cards for an existing user (a user already registered with both you and the platform), make a secure server-to-server POST request to generate a session token.
⚠️ Security Warning: Never perform this request from your frontend codebase. Storing your API Key (
PUBLISHER_API_KEY) client-side exposes your account to unauthorized access.
Request Endpoint:
12POST https://api.single.id/sdk/start_session/{PUBLISHER_USER_IDENTIFIER}
Authorization:
Authorize your request using Basic Authentication, where:
- Username:
{PUBLISHER_IDENTIFIER} - Password:
{PUBLISHER_API_KEY}
Example Command:
1234curl -X POST "https://api.single.id/sdk/start_session/{PUBLISHER_USER_IDENTIFIER}" \
  -H "Authorization: Basic $(printf '%s' '{PUBLISHER_IDENTIFIER}:{PUBLISHER_API_KEY}' | base64)" \
  | jq '.'
Success Response (200 OK):
On success, you will receive a secure token valid for 20 minutes:
1234{
  "userSessionToken": "******"
}
Handling 404 (New User):
If the endpoint returns a 404 Not Found response, this indicates that the user is new to the ecosystem. In this scenario, simply proceed to load the iframe without passing a session token parameter.
Initializing the Web SDK (IFrame Embedding)
To launch the SDK, construct the URL with your configuration properties and bind it as the src attribute of a standard HTML <iframe>.
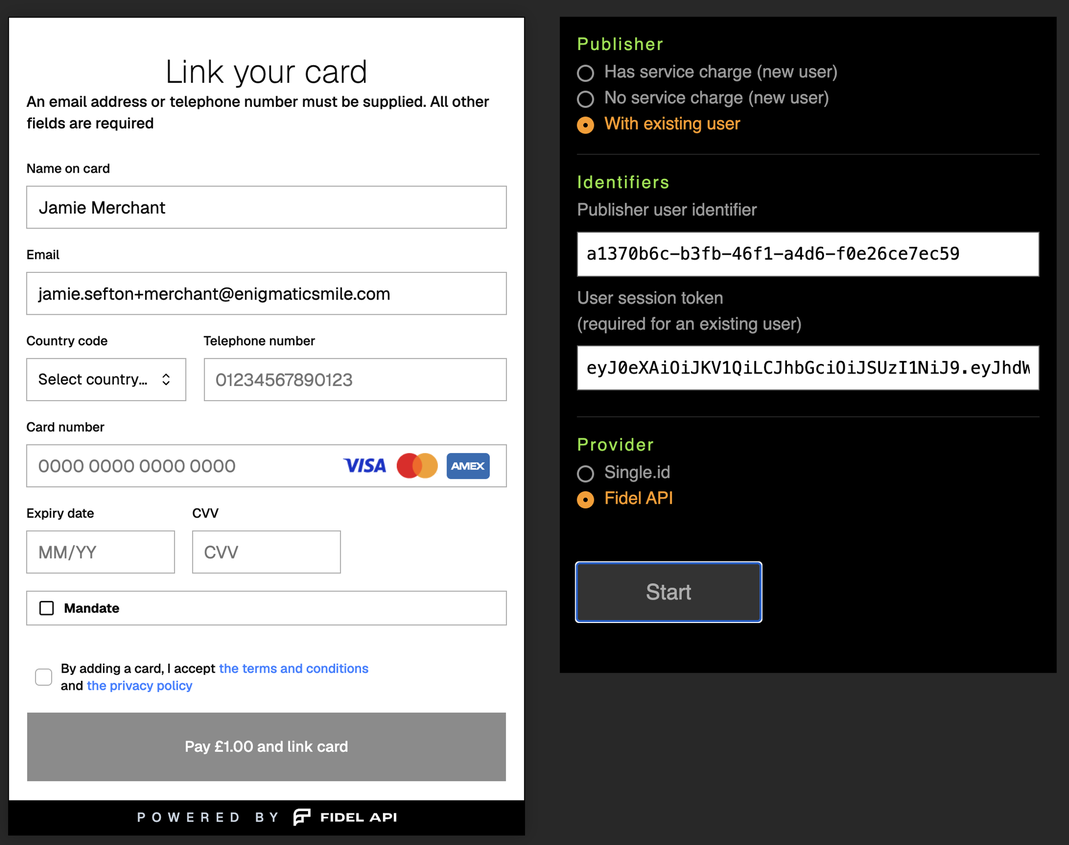
Scenario A: Existing User
Provide the userSessionToken returned from the Pre-bootstrap API:
123456<iframe
  src="https://enrolment.single.id/{PUBLISHER_PUBLIC_IDENTIFIER}/{PUBLISHER_USER_IDENTIFIER}?userSessionToken={TOKEN}"
  style="width: 100%; height: 600px; border: none;"
  allow="payment">
</iframe>
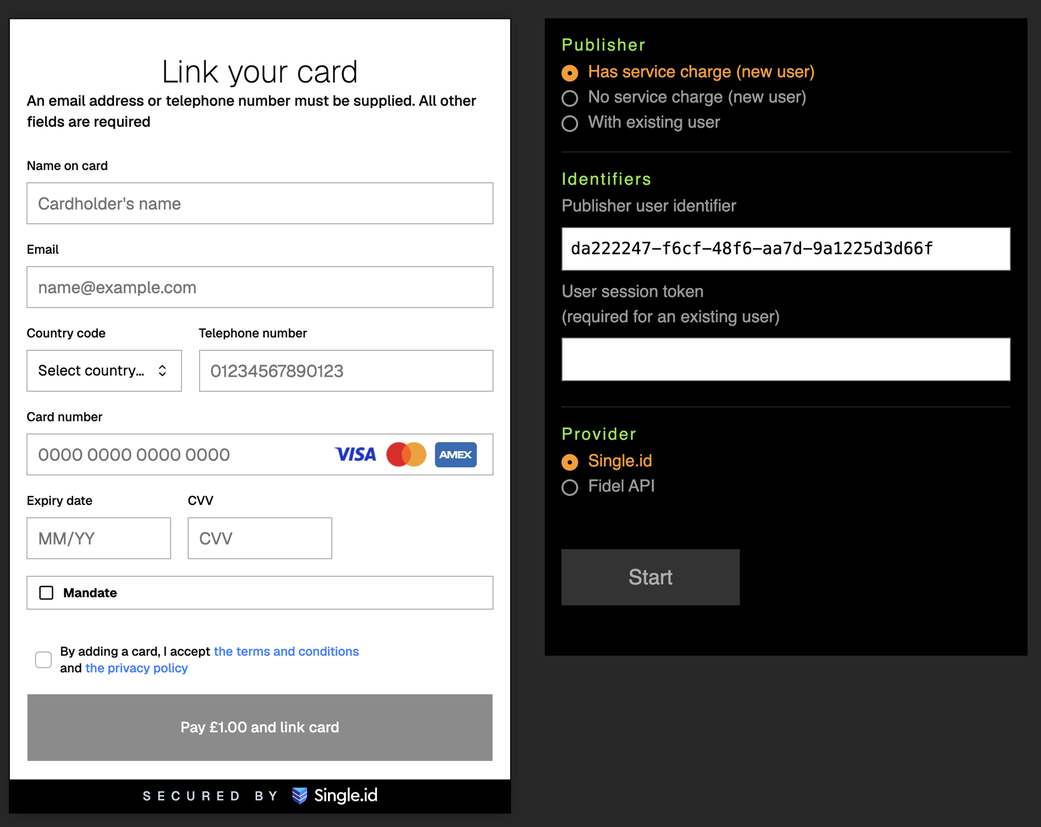
Scenario B: New User (With Service/Registration Charge)
Simply omit the session token parameter. If your account plan mandates a registration fee, the UI button automatically highlights the charge:
123456<iframe
  src="https://enrolment.single.id/{PUBLISHER_PUBLIC_IDENTIFIER}/{PUBLISHER_USER_IDENTIFIER}"
  style="width: 100%; height: 600px; border: none;"
  allow="payment">
</iframe>
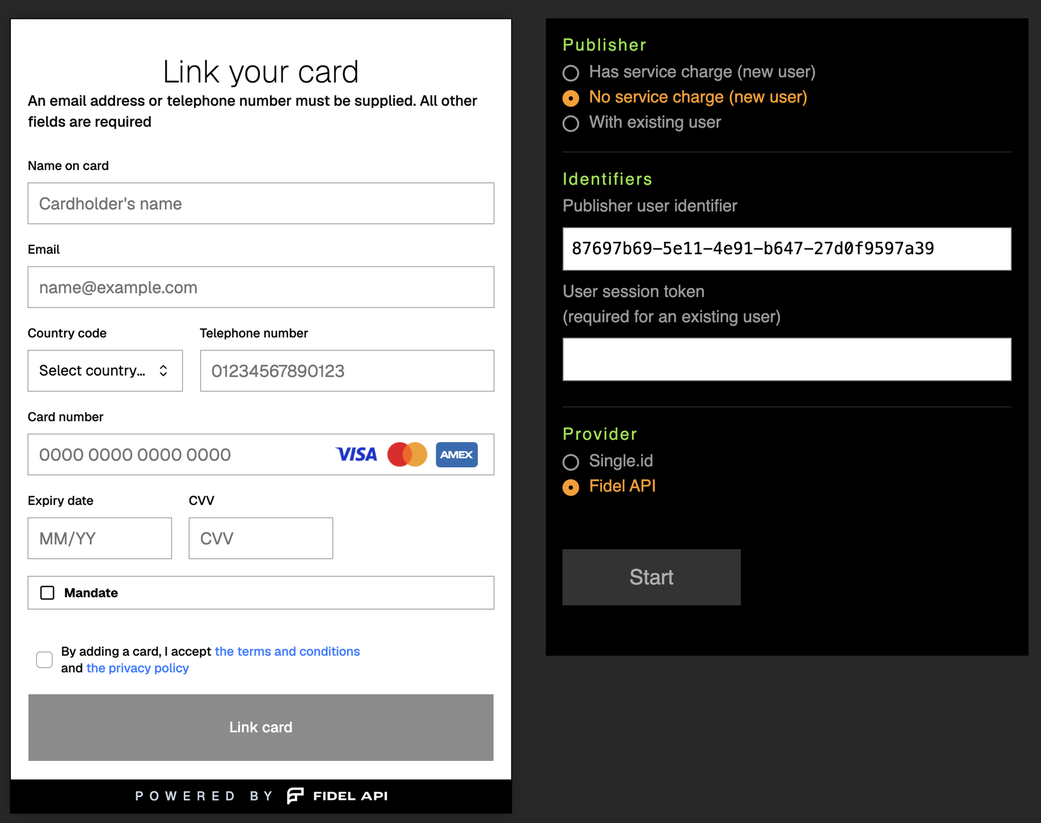
Scenario C: New User (No Service Charge)
If no registration fee is configured, the checkout UI reflects a standard card linking state without charge details:
123456<iframe
  src="https://enrolment.single.id/{PUBLISHER_PUBLIC_IDENTIFIER}/{PUBLISHER_USER_IDENTIFIER}"
  style="width: 100%; height: 600px; border: none;"
  allow="payment">
</iframe>
💡 Pro-tip: The
{PUBLISHER_USER_IDENTIFIER}should be your platform's unique UUID (v4 is strongly recommended) mapping to that specific customer.
Customizing the Web SDK
You can fully match the SDK user interface to your host app's design system using query parameters.
Branding Customization
To display customized partner branding inside the footer of the payment form, append the provider query parameter:
12?provider=fidel
UI Theming Customization
Pass Hex color strings (without the leading # symbol) using the following parameters:
| Query Parameter | Description | Example Value |
|---|---|---|
fg | Controls primary text color | 333333 |
bg | Page container background color | ffffff |
inputFg | Form input field text color | 111111 |
inputBg | Form input field background color | f8f9fa |
inputBorder | Border color for inactive form inputs | cccccc |
buttonBg | Submit button background color | 284880 |
buttonFg | Submit button text color | ffffff |
Fully Tailored Integration Example
Below is an implementation loading the SDK for an existing user, themed with a dark-blue button and custom brand elements:
123456<iframe
  src="https://enrolment.single.id/{PUBLISHER_PUBLIC_IDENTIFIER}/{PUBLISHER_USER_IDENTIFIER}?userSessionToken={TOKEN}&provider=fidel&buttonBg=284880&buttonFg=ffffff&bg=ffffff&fg=333333&inputBg=f8f9fa&inputFg=111111&inputBorder=cccccc"
  style="width: 100%; height: 600px; border: none;"
  allow="payment">
</iframe>
Capturing Web SDK Events
The SDK securely communicates lifecycle state changes and operations back to your host page using the HTML5 window.postMessage API.
Implementing the Event Listener
Set up a global listener in your application's frontend scripts to intercept payloads from the iframe:
1234567891011121314151617181920212223window.addEventListener("message", (event) => {
  // Security Check: Always verify the sender origin
  if (!event.origin.match(/^https:\/\/enrolment\.(dev\.|staging\.)?single\.id$/)) {
    return;
  }

  const { status, message, errorCode } = event.data;

  switch (status) {
    case 'initialised':
      console.log('Web SDK successfully initialized and loaded.');
      break;
    case 'success':
      console.log('Card successfully linked and tokenized!');
      // Handle post-link logic (e.g., redirect or update UI)
      break;
    case 'error':
      console.error(`Error [${errorCode}]: ${message}`);
      handleSDKError(errorCode, message);
      break;
  }
});
Message Structure
All messaging payloads conform to the following schema:
123456type MessageEvent = {
  status: 'initialised' | 'success' | 'error';
  message?: string;    // Only present on status: 'error'
  errorCode?: string;  // Only present on status: 'error'
};
Error Glossary
When the SDK returns a state payload of "status": "error", it will output a defined errorCode. We recommend handling specific codes natively inside your UI context (e.g., warning users, rendering helpful error modals, or triggering a token refresh).
| Error Code | API Message | Description / Suggested Action |
|---|---|---|
no-publisher-public-identifier | "No publisher public identifier supplied" | The public key is missing or invalid in the iframe URL route. Check your route construction. |
no-publisher-user-identifier | "No publisher public identifier supplied" | The user identifier is missing from the iframe URL route. Check your route construction. |
fetch-config-failed | "Failed to fetch publisher configuration" | Internal failure fetching credentials. Verify that your Public Key is correct and active. |
get-token-failed | "Failed to get temporary token" | A critical token retrieval error occurred during the new user initialization step. |
authorisation-failed | "Failed to authorise card" | The transaction network declined card authorization. Request the user use a different card. |
registration-failed | "Failed to register card" | Failed to map the validated card token within the payment networks. Prompt retry. |
user-update-failed | "User update failed" | The API could not persist updated user registration parameters. |
no-user-identifier | "No user identifier supplied" | Critical failure: secure parameters were missing inside SDK state initialization. |
user-exists | "This user exists but no session token was supplied" | The supplied User Identifier is linked to an existing account, but no userSessionToken was passed in the query params. Create a secure session from your backend first. |
user-details-failed | "Failed to get user details" | Encountered failures polling profile details from the backend database. |
missing-bootstrap-data | "Missing required bootstrap data" | A fallback error indicating missing routing variables. Check parameters passed to the iframe. |
missing-update-auth-token | "Missing authentication token when updating user" | Security failure: internal operations lack safe temporary authorization. |
registration-not-ready | "Registration not ready: bootstrap phase incomplete" | Defensive action: Form was submitted before SDK modules finished loading completely. |
bad-session | "Bad session information provided" | Session Token Expired (20-minute limit) or is malformed. Capture this error to request a fresh token from your backend, then re-initialize the iframe. |
unhandled | "An unhandled error has occurred" | A generic internal error. Log and invite user to try again later. |